Creating Custom Views
- From the tree viewer click
 to open the Manage Views dialog box.
 - Click New or Copy.
You cannot modify an original system view or a public view, that is in use by other users.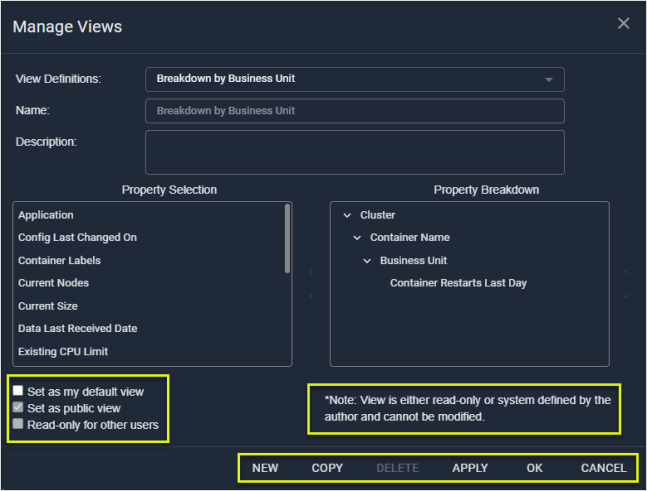
Figure: Manage Views Dialog Box
- Enter the name and description of your new view.
- In the Property Selection list, select a property and then click > to add the property. Your selection appears in the Property Breakdown pane.
- Move the added property up or down to create the desired view.
- To remove a property, select it and press < to return it to the selection list.
- Select the options, as applicable:
- Set as my default view—This view will be selected each time you openKubex.
- Set as public view—All users can use this view. If unchecked, then this view is set as private.
- Read-only for other users—All users can use this view, but cannot edit it.
- Click OK to save the view or Apply to save and apply the view.
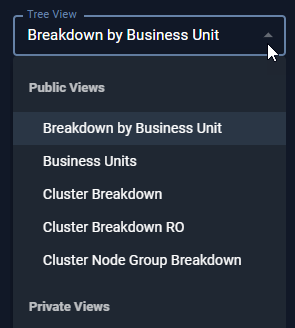
Figure: Manage Views Context Menu
Creating Views from a Table
You can also create a view from any table, using the columns to define your view:- From any page that includes a Table View field, click to open the context menu.
- Click + Add new view and enter a name for your view.
- Click on the column header and drag it to the header bar.
- Move the column around until you have the desired view.
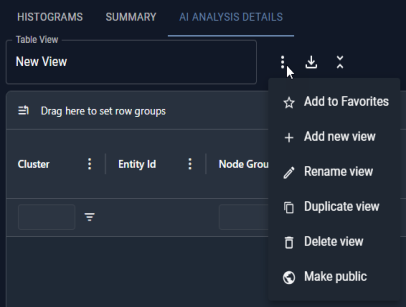
Figure: Manage Views Context Menu